
Piercing light pollution – a comparison among LP filters
by Fabio Di Giorgio
Astrophotography from the centre of a big city may well be one of the most frustrating hobbies, nowadays! I can really imagine few activities being more complex than longing for colourful representations of faint fuzzies thousands or millions of light years away from us, when even the brightest stars are hard to detect in the night sky.
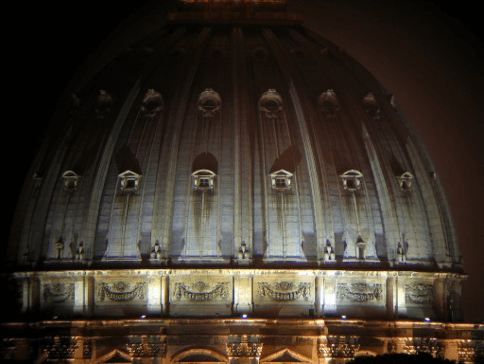
And, well, living in downtown Rome brings this complexity to the next level: this is a picture of St. Peter’s cupola taken from the roof of my building. This should give an idea of the place I observe from, and please note the hue of the background.
I think this can give a good idea of my passion for the one and only measure to fight against light pollution: astronomical filters! Over time, as stars were progressively being washed out from the sky, manufacturers started producing more, and more effective filters to regain some opportunities of observing the night beauties. I have many of these in my personal collection.
And, unfortunately, in the meantime the light pollution signature has changed too: from the old, warm, yellowish lights so well dealt with by wideband filters – more on this later – urban illumination has progressively switched to LED light. Cheaper, less energy demanding, but definitely harder to fight due to its continuous spectrum.
I, as well as thousands of other up-looking friends around the globe, started to feel an increase in light pollution when this new light source was introduced. And around this time I started to wonder: what is the “best” filter to regain access to the night sky?
Now, the definition of “best” should be discussed here.
I fear there is no way to converge on a single definition of best, nor on “THE” best filter; which is why I finally resorted to using more than one filter, in the end.
Please, follow me in the quest I started to find the best combination of filters for astro use. And, while we’re here, let me start with a disclaimer: I am not bound to any producer nor reseller, most of the filters analysed here are my own and I have earned no money in performing this analysis and sharing the results.
Basically, this is how I have chosen the way I shoot my astrophotos.
Hang on, but how do these filters work? What is the magic that allows them to fight light pollution? A detailed review could well fill a math book, with a generous annex on Optics, chemistry, and so on, so let’s just deal with the basics: light of the far away objects, after travelling for light years, enters our objective and finally reaches our sensor. Here, photons are converted into electrons, and the resulting voltage is read, processed and stored in a file.
But, as the deep space target light is acquired, so is the surrounding brightness as well. And, as long as there is no difference in the photons from one source or the other, there is no way our sensor can “discriminate”. So, we now start to understand that we need some magic that helps us in discriminating spacelight from the environment. Now, let’s use the easy example first: nebulae emit only at very specific wavelengths (colours): so, if we can let these through, the contrast between target and light pollution can be increased. THIS is the way filters work, thanks to a series of very thin layers of absorbing and reflective materials. The more stray light is rejected while preserving target light, the more contrast is increased; and narrowband filters do this really well.
But, before purchasing the narrowest filter on the market, just wait a second! Starlight is more or less a continuum, so what would be the effect of this filter on stars or, alas, on galaxies which are composed of stars? Unfortunately, they would be reduced almost exactly as the light pollution is (well, not 100% accurate but not so far either). True, if we manage to filter out light pollution more than starlight, it would still work: and this is the principle of wideband filters. They are not as selective as narrowband ones, but they try to remove the wavelengths where the highest light pollution is, leaving the others – mostly – untouched. They still provide a contrast increase, albeit a lower one, yet they also preserve the star colours. Well, sort of.
I started “serious” astrophotography with a SkyWatcher ED80 and a Canon 350d DSLR and, while at the end of the journey (spoiler alert!) I have resorted to a cooled, mono, astro camera and narrowband filters (and electronic filter wheel, and autofocuser, … but do you remember where I shoot from?) I still use a DSLR when on the move, and I perfectly understand people wishing for less complex – and expensive – solutions and are perfectly happy of one shot colour, be it with a DLSR or a CMOS.
So, I grabbed a tripod, my Full Spectrum modded Canon 650d (which means all stock filters have been removed and it can’t take “ordinary” pictures anymore) with a Jupiter 135 f 3.5 lens and a Paton Hawksley Education ltd. Star Analyser 100 grating, I 3D printed a basic adapter to hold the grating in front of the objective; then I looked out of my windows and faced a few of the streetlights that were driving me crazy.

This is the setup I used to acquire the spectra driving the tradeoff: in this configuration, the 135mm focal length and 4.3um pixels of the DSLR yield a 0.316 nm/px (read nanometers per pixel) of spectral resolution. More than enough to compare the different filters I have accumulated in these years!
The next two pictures show the position of a few streetlights by day and night. Some of them are still old mercury ones, and others have already been replaced by LEDs.


Next picture shows the mercury light spectrum, acquired with Astronomik L2 filter, hence Infrared light has been suppressed. Two levels of exposure are depicted, to show both the very clear peaks (above) and the much lower continuous component (below). Besides a small blue contribution, the main emission is between green and orange, which yields a very warm hue.
Clearly enough, if a filter contains “notches” in these wavelengths, the polluting effect of this light can easily be reduced.

And now, the spectrum of a LED streetlight, this too acquired with Astronomik L2 filter removing Infrared light. Same two exposures as before, although the intensity can’t be directly compared, as coming from two different lamps.

Next picture shows an LED streetlight spectrum and histogram: on the horizontal axis the wavelength, on the vertical one the intensity for each colour / wavelength.

And now, the first result: this is a comparison of the old and new streetlight spectra, this is what urban astrophotographers have to fight against.

The first evidence is: old vapour light had some very clearly defined emission lines, while the new LED one has a peak in the blue but then a continuous emission from the deep green to the infrared. This makes LED much harder to fight with filters.
And finally – for now – next picture collects the “pass bands” of several commercial light pollution suppression filters.
On the top I have reported the main interesting emission lines, the chemical element, their colour and wavelengths. When shooting nebulae, we are only interested in: Oxygen (teal colour), Hydrogen (infrared, with a very minor teal component) and Sulphur (again, infrared). Mercury (HG) and Sodium (Na) are also depicted in the graph.
On the right the compared brands and types.

Each line of this picture has been obtained shooting the panoramic view with the filters in the light train, and comparing the response to LED light, to get the feeling of which parts of the continuous spectrum are blocked (or reduced) most. Optolong L-eXtreme is only estimated, because its extremely narrow band (7 nm) can’t be reproduced correctly due to the lamps being too close to the camera (and, from the following analysis, its bandpass could be quite inaccurate in this picture). The new Optolong L-Ultimate, with its 3nm dual bandpass, would be similar but even about half that width.
A further test could be performed using a white star or a Galaxy core (to get an even better approximation of a continuous spectrum), but I feel that the picture above is already clearly showing the differences, in qualitative terms if not in quantitative ones.
From the selection above, we can clearly distinguish three filter types:
- UV-IR cut: like the Astronomik L2, these filters are used to reduce “invisible” light and to render a human vision like picture with sensors whose spectral response extends in the UV and IR. The main purpose is to suppress the frequencies that are not focused correctly through a lens system.
- Wideband filters: these deal with light pollution by removing the wavelengths associated to light emission. Unfortunately, they are very efficient with “old” fashion lights, but leave much to be desired – read, let a lot of light through – with LED ones. These filters apply a soft cut, allowing an increase of contrast yet preserving star colour (well, more or less).
- Narrowband filters: this is the brute force approach! ALL the light is filtered out, with the exception of the nebulae emission wavelengths. This allows a huge increase in contrast, but star colour is basically lost. And you can forget imaging any galaxy, clearly enough. There are several kinds of filters, with decreasing bandwidths down to 3 nm: the narrower, the higher the contrast. But there’s no free lunch: stars will accordingly be deleted and star colour altered.
Next picture compares the UV/IR cut and the wideband filters with the two light spectra: clearly enough the L2 filter does not provide any sort of light pollution reduction, while it is evident that the Optolong L-Pro and the Hutech IDAS D1 were designed to deal with mercury (and sodium) light, and they do it very well, as they remove only these wavelengths. They have a very similar behavior, with two main differences, described below.

The L-pro has a larger pass band in the infrared, while the D1 has a sharper cut just after the Sulfur line. This hints to a more “reddish” hue in the Optolong filter. The D1 also cuts a bit more of the UV-deep blue.
But, more notably, the L-Pro leaves some yellow pass through, while the D1 is MUCH more selective here.
From all the above, starlight is better preserved by the Optolong than the Hutech filter, which basically removes all yellow from the stars; but this at the cost of a lower filtering effect and a red cast, while the D1 is basically colour neutral and does not require almost any colour balancing in post processing.
Both filters can be employed to reduce rural or sub-urban pollution, where it is not too heavily impairing the sky view, the selection of one over the other is mainly matter of subjective taste (and budget!). They can even be employed to image galaxies, but unfortunately they both fall VERY short of dealing with heavy light pollution.
Well, enough theory, the proof of the pudding is in the eating, so what follows is a real test on a nebula, which is the main target managed by all filters.
Next picture compares a 60” exposure of the Orion Nebula, taken with the above filters; same time, same position, same setup, no processing: all conditions being equal, this picture tells us which filters improve the image quality most and how they do it.
Please take into account that, at the time of this first comparison, I did not have an Optolong L-eXtreme available yet. And before receiving it, I sold the Sharpstar 72ED that was used in this first shootout, hence, not having a way to add the eXtreme to the comparison, it’s not included in the test at this stage.

Image above, from top to bottom: Astronomik L2 and Optolong L-Pro, IDAS D1 and IDAS V4, Optolong L-eNhance and Astronomik H-Alpha (12 nm), Astronomik OIII (12 nm) and Explore Scientific OIII
A first result is clearly visible: narrow band filters provide a much darker image so the target is left unscathed, yet the background becomes a lot less intrusive.
But, while the comparison above provides us with a first idea of the improvement, this is NOT the way filters should be employed! Actually, under certain hypotheses, we’re not going to stick with the same exposure time regardless the chosen filter: if the background is reduced, we can increase the exposure time and grab more photons, reaching deeper in the target details.
So, let’s repeat the comparison increasing the exposure for narrower filters, and let’s see the result.
I shot a series of 30”, 60”, 120” and 180” subs with each filter. Next picture compares the unprocessed frames at different exposures trying to have compatible background levels between the different filters. Narrower filters allow for longer exposures and provide more details on the nebula.

From the above comparison, the Optolong L-eNhance looks the most promising solution from a heavy light polluted site. After receiving an L-eXtreme, I performed an in depth comparison of these two filters, with a quite stunning surprise, I’d say! Here below, the North America nebula has been acquired with the two Optolong narrowband filters: in the shots with the eNhance the target was lower over the city centre, and moon was high in both cases: I was shocked when I saw the images out of camera (with just autostretching by PixInsight). Yet, after processing, there wasn’t any big difference between the results. Both images are the stacking of 14 x 240s subs @ ISO1600. Dark frame corrected, no flats. All the following images have been acquired with a TecnoSky 60 APO (60mm f6, FPL53 / Lanthanum refractor) with 1x field flattened.

Image above. North America Nebula: Enhance on the left, Extreme on the right. The upper row only exhibits an autostretch, the lower one the fully processed image
I then shot the Orion nebula, and its bright core limited the autostretch amount to a better image already before processing: here, the L-eXtreme shows its improved colour balancing out of camera with respect to the L-eNhance which has a green dominant. Yet, also in this case, the processed images are very similar, and I even prefer the eNhance one where the OIII in the Running Man nebula is more visible.
Both images are the stacking of only 5 x 180s subs @ ISO1600, dark and flat field corrected. Well, the target is very bright, but really not bad for only 15 minutes out of a very light polluted city!

Image above. Orion Nebula: Enhance on the left, Extreme on the right. The upper row only exhibits an autostretch, the lower one the fully processed image
Next tables report the statistics of a background patch for both images before and after channel balancing: the better colour balance of the eXtreme is confirmed, as well as the much darker background.
To exploit this filter to its best, much longer acquisitions are needed.

The next comparison has been made between subs taken with the L-eNhance at 180” and the L-eXtreme at 300”, trying to exploit the narrower passband and the darker background of the latter filter. The result on the bright Crescent is not really different, but the surrounding nebulosity is better highlighted by the Extreme: this is the main result of this comparison, showing the benefit of longer subs.

Image above. Crescent Nebula: Enhance (180” subs) on the left, Extreme (300” subs) on the right. The upper row only exhibits an autostretch, the lower one the fully processed image

Image above. M1 Comparison: L-eNhance and L-eXtreme, different Exposure lengths
Being surprised by the better visibility of the Running Man nebula as well as apparently greater detail in M1, after a discussion with Luca of TS Italia Astronomy, I gave a more detailed look at the spectral response of the two filters as declared by the manufacturer. Now, all this needs to be taken with a grain of salt because:
- These graphs may lack the resolution for fine analysis
- Variation from one sample to another could impair the accuracy: this is applicable both for the datasheet (Explicit statement: This curve is only for reference, and is not used as the final product data) and more so for MY SPECIFIC sample of L-eXtreme…
Yet, I overlapped the two bandpass figures (images directly extracted from Optolong site) and here are a few considerations:
- The L-eNhance seems to have a higher transmission, about 96% , while the eXtreme exhibits a 93% only. This could account for a slightly better OIII response and could be explained by the easier manufacturing process of the larger bandwith one.
- Furthermore, the two images have been coregistered and all other emission lines are perfectly matched, but the OIII one shows a mismatch, and this could be the main answer to the specific topic: Oxygen III emits in a main line at 500.7 nm and a secondary one at 495.9 nm (4959 angstroms and 5007 angstroms). Yet the L-Extreme picture shows the line slightly to the right of the L-eNhance one, which could mean that the former ONLY targets the 500.7 line, while the latter allows BOTH lines, as well as the H-Beta one at 486.
As a matter of fact, with its 7nm bandwidth centered on 500.7, the lower bandpass would be at 497.2, so the 495.9 line would be strongly rejected.

So, the question seems to be whether leaving the secondary line through, alongside a slightly larger amount of light pollution (and H-Beta, of course) has a payoff. And from the real images the answer is YES for the two filters I have tested; and I actually mean the two SPECIMENS, as your mileage may vary due to production tolerances.
Basically, the improvement of background obtained by the narrower bandpass does not seem to compensate the signal lost by the L-eXtreme, at least under my sky conditions.
One more explanation could be that what’s appearing in the picture is the tiny contribution of H-Beta, a wavelength which is transmitted by the eNhance but rejected by the eXtreme. A test with this kind of filter would answer this question, but I didn’t perform any as only very few objects have a significant H-Beta contribution, for the rest being very marginal.
Anyway, whichever the explanation, the bottom line is that there are two opposite effects here:
- The (fixed) additional signal passed by the eNhance, be it OIII or H-Beta: this does not change with the level of light pollution but is constant and only depends on the ratio between the 501 and the 496 OIII line; the best info I could find is that the 496 line is between one third and half the intensity of the main 501 line.
- On the other side, the contrast improvement provided by the eXtreme’s narrower bandwidth depends on the light pollution of the specific location: it is very limited for a dark location, and linearly increases with the level of background. From the datasheet, the OIII bandwidth of the eXtreme is about 25% of that of the eNhance (which is already quite narrow!).
Missing any quantitative data, just in qualitative terms next figure explains the status: there is a given point where the effect of light pollution and signal loss fully compensate. For a better sky than this, the L-eNhance is the best choice, else the L-eXtreme (or even L-Ultimate) selectivity pays off.

Several online reviews and reports mention a higher haloing issue with the eXtreme than with the eNhance: I can’t state that, based on my tests, as it doesn’t show in the images (i.e. the M42 one, above). But I have not specifically tested the filters on very bright stars just to measure that behaviour.
Conclusions:
The choice of the filters should start from the light pollution conditions of the observation sites: there is no “one size fits all” filter. And, while increasing the cutting power leads to an enhanced contrast on nebulae, it also removes star colour and basically inhibits imaging of galaxies.
The focus being on nebulae (Galaxies don’t benefit of these filters, they will be covered in a dedicated test), I’ll propose my solutions below, but a few elements can already be highlighted:
- Narrowband filters yield the highest contrast increase to cope with heavily light polluted sites, and experience shows that H-alpha is the least impacted band: but when using a OSC (one shot colour) imager based on a Bayer matrix, Ha filters have one big drawback; only one out of four pixels is sensitive to red, hence this configuration is very inefficient. A multi-band filter is strongly advised in this case, H-Alpha filters are best employed with monochrome sensors.
- Another consideration is relevant to narrowband filters: darkening the background they allow using longer exposures to highlight fainter details; but, to best exploit this opportunity, the mount must track accurately for this exposure time; besides this constraint, longer exposures also increase thermal noise and cooled cameras can better manage this than Reflex ones.
- One additional element to be taken into account: the narrower the bandwidth, the darker the image, so framing and focusing using L-eXtreme (and I’m sure the L-Ultimate will be even worse!) IS REALLY HARD. Only very bright stars can be used for this purpose with a bathinov mask.
Dual band filters (i.e. Optolong L-eNhance, L-eXtreme or L-Ultimate) can be used even with Monochrome sensors: in this case they provide a (still greyscale) “Luminance” image collecting H-Alpha, OIII and possibly SII light, which can then be complemented with separate colour acquisitions. The advantage wrt. just getting the three colours is that the luminance channel can improve the Signal to Noise ratio and the single bands can then just be used to colour the image.
So, finally, my choice is: Monochrome sensor with narrowband (HSO) filters from the city centre, Monochrome with wideband and LRGB filters PLUS a Full Spectrum DSLR and Hutech IDAS D1 from the country. But, clearly enough this requires, in my case, two totally different setups (which I then also pair to two different optics, mounts, etc.); so, if OSC is the target sensor, what is the best tradeoff?
Proposed solution:
- If only shooting from low light pollution sites -> Hutech IDAS D1 (or L-Pro, second best)
- If only shooting from medium light pollution sites -> Optolong L-eNhance
- If only shooting from high/very high light pollution sites -> Optolong L-eNhance or L-eXtreme
- If imaging from both high and low pollution sites the L-eNhance is the most flexible choice, otherwise two filters can be used: one between Optolong L-eNhance or L-eXtreme plus the Hutech IDAS D1 (or L-Pro, second best).
Disclaimer: all filters used in this test are my own, purchased over time to deal with light pollution, with the exception of the Optolong L-eNhance and L-eXtreme which I borrowed from TS Italia Astronomy. No money was exchanged and the filters have been shipped back at the end of the test.
All the considerations included in this test are just my own ones, and no request to change anything was issued by TS Italia Astronomy in return for lending me the filters.
Finally, in the wide ocean of other solutions available on the market, there seems to be one very interesting alternative I have not tested: the IDAS NBZ seems to have a response similar to the Optolong L-eNhance and L-eXtreme, and could be even better, at a very similar cost to the eXtreme.
Final note: you can read the original version in Italian of this post on Teleskop Express website’s blog at https://www.teleskop-express.it/. I’d like to personally say Thank You to Fabio Di Giorgio for this in-depth and detailed post: his fight against light pollution from Rome it’s been a long one, and this is a very detailed and extensive analysis on the best existing solutions. I look forward to hosting more of his articles on this blog! Giancarlo